

Building a Modular Azure Deployment with Bicep: A Practical Guide
Bicep is a domain-specific language (DSL) for deploying Azure resources declaratively. It's a more readable and concise alternative to JSON-based Azure Resource Manager (ARM) templates.
Why Use Bicep?
You should use Bicep because it simplifies the process of authoring Infrastructure as Code (IaC) for Azure. Its key advantages include:
Simplified Syntax: Bicep's syntax is much cleaner and less verbose than ARM templates, which reduces boilerplate and makes your code easier to read and maintain. You can create resources without the repetitive
type,apiVersion, andpropertiessections found in JSON.Modularity: Bicep makes it easy to break down large deployments into reusable modules. This promotes code reuse across projects, improves readability, and allows different team members to work on separate components without affecting the main template.
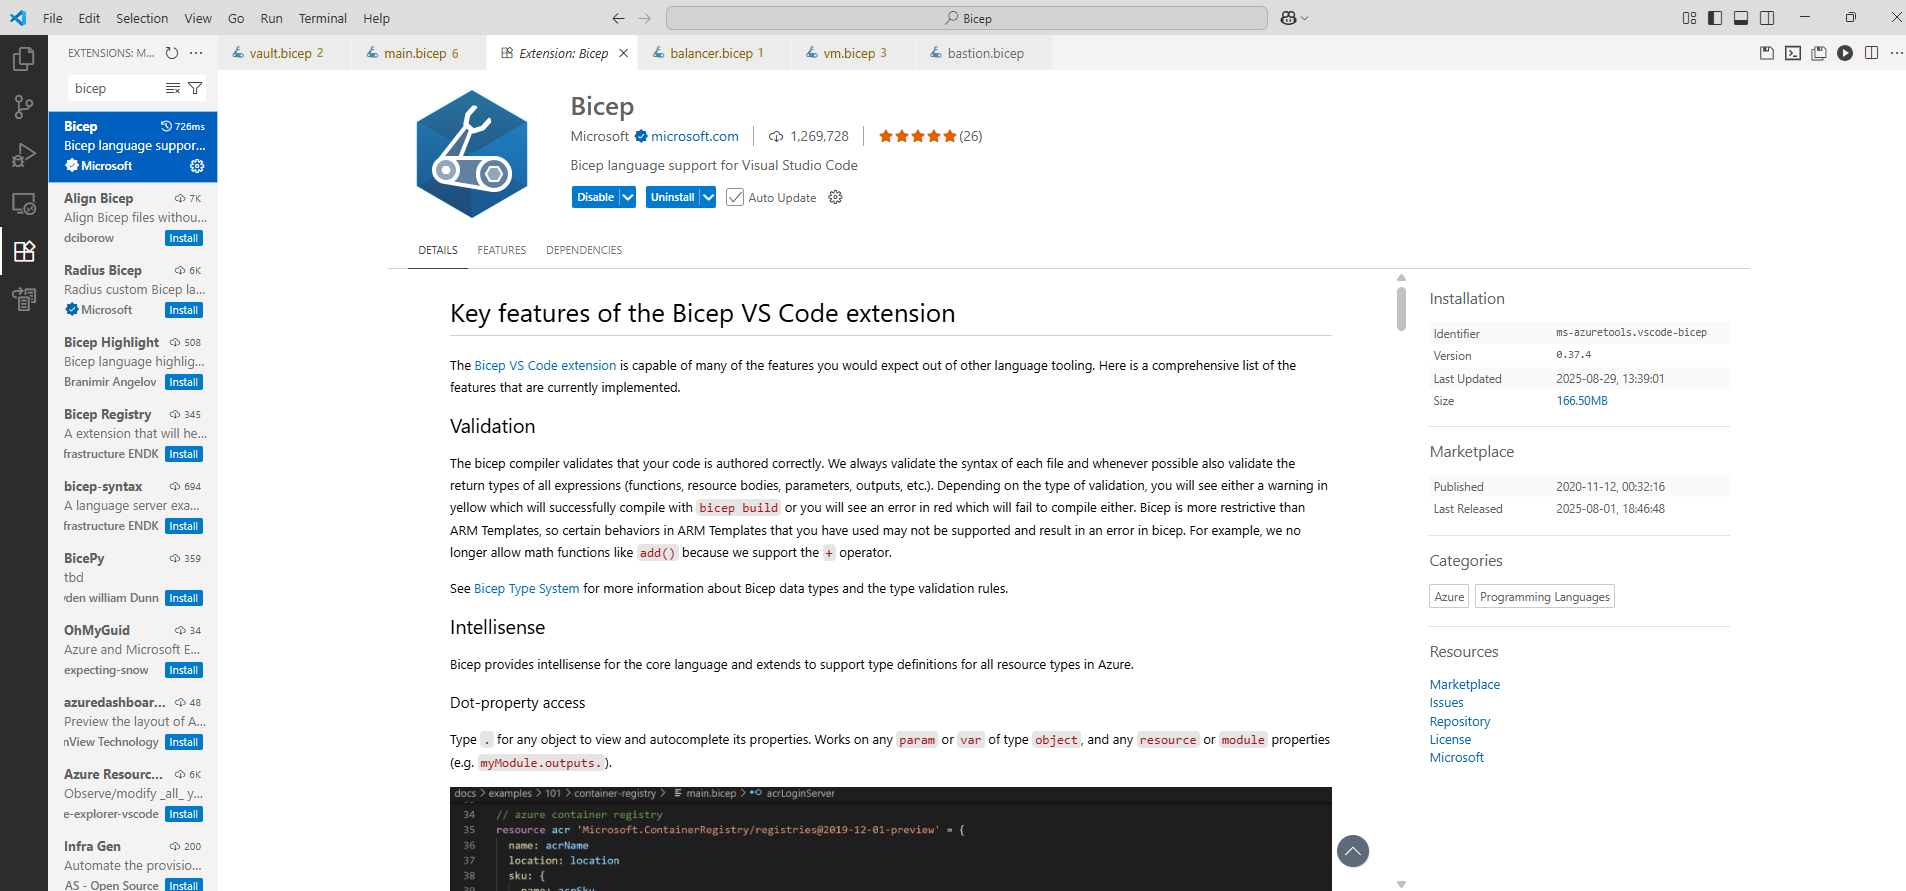
Improved Safety: The Bicep VS Code extension provides a rich authoring experience with IntelliSense, syntax highlighting, and real-time validation. This allows you to catch errors and typos before you even run the deployment.
Automatic Dependency Management: Bicep automatically detects and manages dependencies between resources. By referencing one resource in another (for example, a virtual machine using a virtual network's ID), Bicep understands the correct deployment order, eliminating the need for explicit
dependsOnarrays.Ease of Adoption: You can decompile existing ARM templates into Bicep code using the Bicep CLI, making it easy to transition your current infrastructure and start using the new language.
Prerequisites
Make sure you have Powershell 5.6.0 or higher (Check it with $PSVersionTable.PSVersion command)
If needed,install PowerShell 7:winget install --id Microsoft.PowerShell --source winget
Install AZ module:
Install-module az
import-module az
Connect to Azure:
Connect-AzAccount
Install Bicep tool
Not needed but,highly recommended,install VS code and Bicep extension
Bicep code is available here.
What are Bicep Modules?
Think of a Bicep module as a self-contained unit of deployment. It's a Bicep file (.bicep) that can be called from another Bicep file, known as the parent or root template. This approach promotes several key benefits:
Reusability: Write a module once and reuse it across multiple projects. For example, a module for a virtual network can be used in every deployment that requires one, ensuring consistency and saving time.
Readability: Large, monolithic templates can be hard to read and understand. Modules help by logically organizing your code, making the main template easier to follow.
Maintainability: Changes only need to be made in one place. If you need to update a resource configuration, you can modify the relevant module without touching the entire codebase.
Reduced Complexity: By abstracting away the details of individual resource creation, the main template focuses on the overall architecture and how different components fit together.
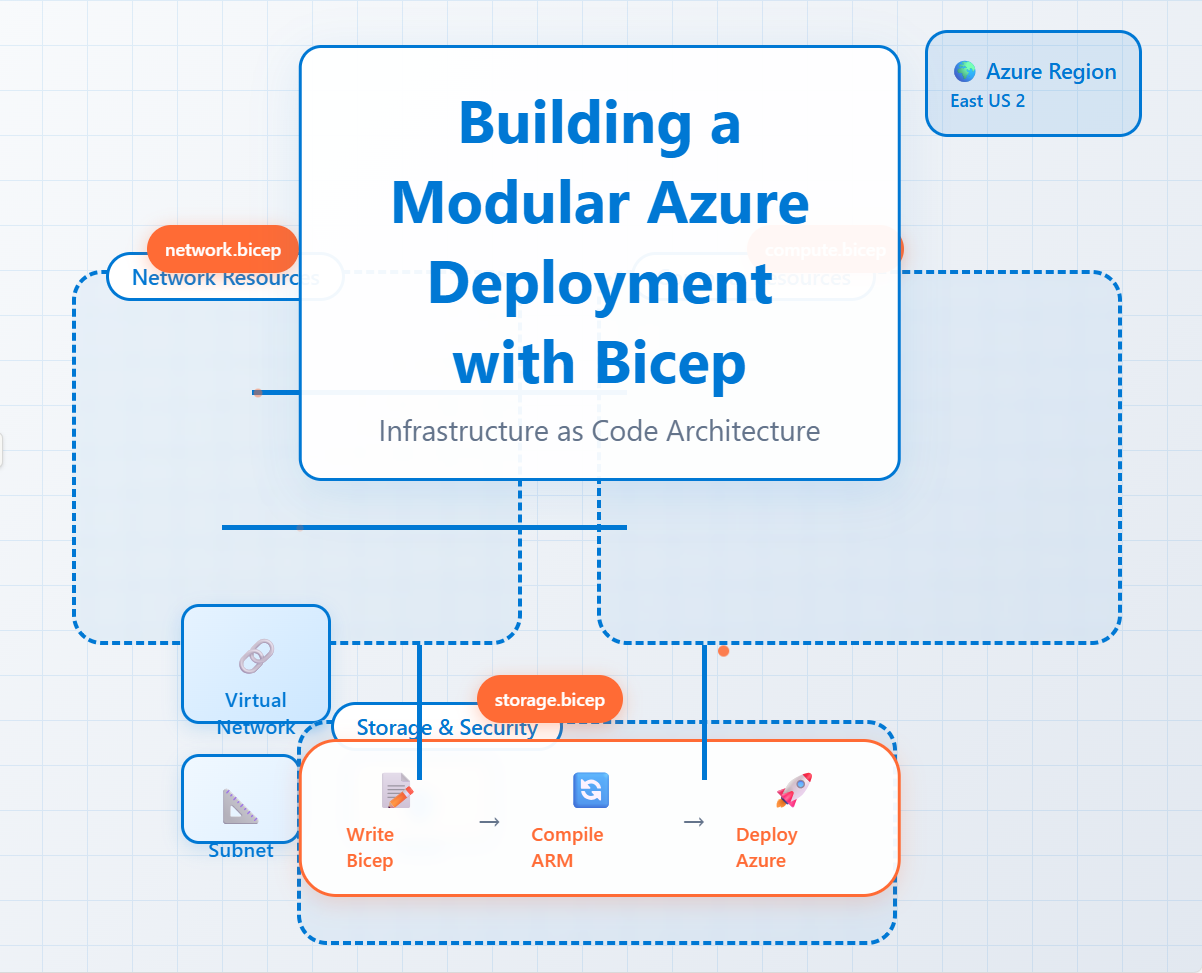
Deconstructing a Bicep Deployment: A Practical Example
Let's examine the main.bicep file you provided to see how these principles work in practice. The main file acts as an orchestrator, defining the overall architecture and calling individual modules for each major component.
🛠️ The main.bicep Orchestrator
The main file starts by defining parameters and variables that are passed down to the modules. This centralizes configuration and makes the deployment flexible. For instance, the location and environment parameters are used throughout the deployment.
param location string = 'westeurope'
param environment string = 'dev'
// ... and many more
Next, it creates resource groups to logically organize the deployed resources.
resource vnetRg 'Microsoft.Resources/resourceGroups@2021-04-01' = {
  name: vnetRgName
  location: location
}
// ... and other resource groups
Calling the Modules
The main.bicep file calls modules for each part of the infrastructure: a virtual network, a bastion host, a virtual machine, a key vault, and a load balancer.
1. Virtual Network (VNet) Module 🌐
The vnetModule call deploys the network infrastructure. Notice how the parent template simply passes parameters to the module without needing to know the low-level details of how the VNet and its subnets are created.
Фрагмент кода
module vnetModule 'module/vnet.bicep' = {
  name: 'deployVNet'
  scope: resourceGroup(vnetRgName)
  params: {
    vnetName: vnetName
    // ... other parameters
    deployWANSubnet: deployWANSubnet
  }
  dependsOn: [
    vnetRg
  ]
}
The dependsOn: [ vnetRg ] line is crucial. It tells Bicep that the vnetModule deployment can't start until the vnetRg resource group has been successfully created. This establishes the correct deployment order.
2. Bastion Host Module 🔒
The bastionModule is called conditionally using an if statement. This demonstrates how modules can be deployed based on a parameter's value, making your templates even more dynamic.
module bastionModule 'module/bastion.bicep' = if (deployBastionSubnet) {
  name: 'deployBastionHost'
  scope: resourceGroup(bastionRgName)
  params: {
    bastionSubnetID: vnetModule.outputs.bastionSubnetId
    // ... other parameters
  }
}
This module requires the bastionSubnetId from the VNet module. Bicep automatically understands this dependency, so the VNet module will always deploy first. The vnetModule.outputs.bastionSubnetId syntax is how a parent template accesses values exported by a module.
The same pattern is repeated for the other components:
vmModuledeploys the virtual machines, also using a conditionalifstatement and a lookup map to get the correct subnet ID.vaultModulehandles the Key Vault deployment, a standard practice for securely storing secrets.balancerModuledeploys the load balancer, demonstrating how complex resources can be encapsulated in a single module.
Outputs
Finally, the main.bicep file defines outputs, which allow the results of the deployment (like resource IDs or public IP addresses) to be returned to the user. This is particularly useful for scripting and automation.
output vnetId string = vnetModule.outputs.vnetId
output bastionHostId string = deployBastionSubnet ? bastionModule.outputs.bastionHostId
Module for deploying an Azure Load Balancer
This Bicep module provides a flexible and comprehensive solution for deploying an Azure Load Balancer. It is designed to be highly configurable, allowing you to define various aspects of your load balancer deployment, including the environment, project name, location, and key resource properties.
With this module, you can easily:
Create a Public IP Address and associate it with the load balancer.
Define Load Balancing Rules for different ports and protocols, ensuring traffic is distributed effectively to your backend resources.
Configure Health Probes to monitor the health of your backend instances, ensuring traffic is only sent to healthy virtual machines.
Set up Inbound NAT Rules to map specific ports on the load balancer's public IP to individual virtual machines in the backend pool.
Module for Deploying Azure Bastion
Azure Bastion provides a managed, secure, and seamless way to connect to your VMs directly from the Azure portal over a private network connection. The module creates two primary resources:
Public IP Address (
bastionPublicIp): Every Bastion Host requires a public IP address to allow secure communication from the Azure portal. This module automatically creates a Standard SKU Public IP with a static allocation method, which is a requirement for Bastion. It also uses thezoneCountparameter to make the IP address zone-redundant, matching the Bastion Host's availability settings.Bastion Host (
bastionHost): This is the core resource. It's configured to use the public IP address and the dedicated Bastion subnet provided as parameters. Thetagsvariable ensures that the resource is properly labeled for your organization. TheipConfigurationsproperty links the Bastion Host to the public IP address and theAzureBastionSubnet, establishing the network connectivity it needs to function.
Module for Deploying Azure Vault
🔐 Secure by Default
The module configures the Key Vault with enableRbacAuthorization: true, which uses Azure Role-Based Access Control instead of the older access policies model. This provides more granular control and aligns with Azure's recommended security practices. It also sets defaultAction: 'Deny' for network access, meaning only traffic from explicitly whitelisted IPs or trusted Azure services can connect to the vault.
👥 Granular Access Control
Instead of granting a single broad "Key Vault Administrator" role, the module assigns two more specific built-in roles to the specified objectId:
Key Vault Crypto Officer: Manages cryptographic keys.
Key Vault Secrets Officer: Manages secrets.
This follows the principle of least privilege, ensuring the principal only has the permissions it needs. The module also automatically assigns the required roles for Azure Disk Encryption to a fixed service principal, enabling it to access secrets and keys for encrypting virtual machine disks.
🔑 Secret Provisioning
The module also provisions a new secret within the vault. The secretName and secretValue parameters allow you to create an initial secret as part of the deployment, which is a common practice for bootstrap configurations or storing initial credentials.
Module for deploying Azure VM
The module leverages Bicep's advanced features to create resources conditionally and dynamically:
Multiple VMs: The
numberOfVMsparameter allows you to deploy multiple VMs using a singleforloop. The module will create a corresponding VM, network interface, data disk, and public IP (if enabled) for each instance.Public IP Addresses: The
createPublicIpboolean parameter determines whether a public IP address is provisioned and attached to the VM's network interface, giving you control over public exposure.OS-Specific Configuration: Using Bicep's ternary operators (
?:), the module dynamically selects the correct OS image and profile settings (e.g., SSH key for Linux vs. password for Windows), reducing the need for separate templates.Availability Zones: The
zoneCountparameter ensures VMs are distributed across availability zones for high availability and resilience. Themodoperator (%) is used to cycle through the zones, distributing VMs evenly.
Network Integration & Load Balancer Support 🌐
The module seamlessly integrates the VMs into your existing network infrastructure:
Subnet Integration: It uses the
subnetIdparameter to place the VMs in a pre-existing subnet, ensuring they are part of your established virtual network.Load Balancer Backend Pool: The
loadBalancerBackendPoolIdparameter allows you to automatically add the VM's network interface to a load balancer backend pool. This is a crucial step for deploying web servers or other scalable applications behind a load balancer.
Module for deploying Virtual Network
Using a set of boolean parameters (e.g., deployWANSubnet, deployDMZSubnet), you can choose which subnets to deploy. This allows you to use the same Bicep file to provision a wide range of network topologies, from a simple development environment with just a couple of subnets to a complete production environment with multiple security zones.
🔐 Automated Security with NSGs
The module enforces a secure, multi-tier architecture by automatically creating and associating Network Security Groups (NSGs) with each deployed subnet. The NSGs come pre-configured with a set of security rules that define the flow of traffic between the different tiers. This ensures that:
WAN Subnet can be accessed from the Management subnet for administrative purposes.
DMZ Subnet is exposed to the internet for public-facing services (e.g., web servers).
App Subnet can only receive traffic from the DMZ.
Database Subnet can only be accessed from the App subnet.
This "deny-by-default" approach ensures that traffic is strictly controlled, significantly reducing your attack surface. It also includes specific rules to allow connections from a conditionally deployed AzureBastionSubnet for secure remote access.